
Hi fellow creatives, and welcome back to the blog! As a potter, my hands are usually covered in clay, but this season, I’m trading my throwing wheel for a pumpkin.
If you’re anything like me, you love the earthy, textured, one-of-a-kind feel of handmade pottery. So why settle for a generic, shiny orange pumpkin on your doorstep?
This fall, I’m bringing the Zeolar Ceramic studio vibe to my seasonal decor. I’m going to show you my secret potter’s trick for turning any pumpkin (real or fake!) into a stunning piece of no-carve modern art that looks like it came straight from a high-end ceramic studio.
The best part? It’s incredibly easy, and you don’t need a kiln. All you need is some paint and one secret ingredient that I guarantee is already in your kitchen.
Let’s make something beautiful.

Why You’ll Love This Faux Ceramic Technique
This is more than just a craft; it’s a piece of art. This “faux ceramic” method is my absolute favorite way to create chic fall decor that feels authentic and elevated.
-
Gives You That “Pottery” Texture: This isn’t just paint. We’ll use a special technique to create a perfect matte, slightly gritty texture that mimics a Wabi-Sabi or stoneware glaze.
-
Elevated & Chic Decor: This “no-carve” technique creates an elegant, high-end look that sets your decor apart.
-
A Budget-Friendly Transformation: You can use those cheap foam pumpkins from the craft store and make them look like expensive, artisan decor. It also works beautifully on real pumpkins!
-
Incredibly Easy (I Promise!): You don’t need to be a professional artist. If you can mix and spread paint, you can make these.
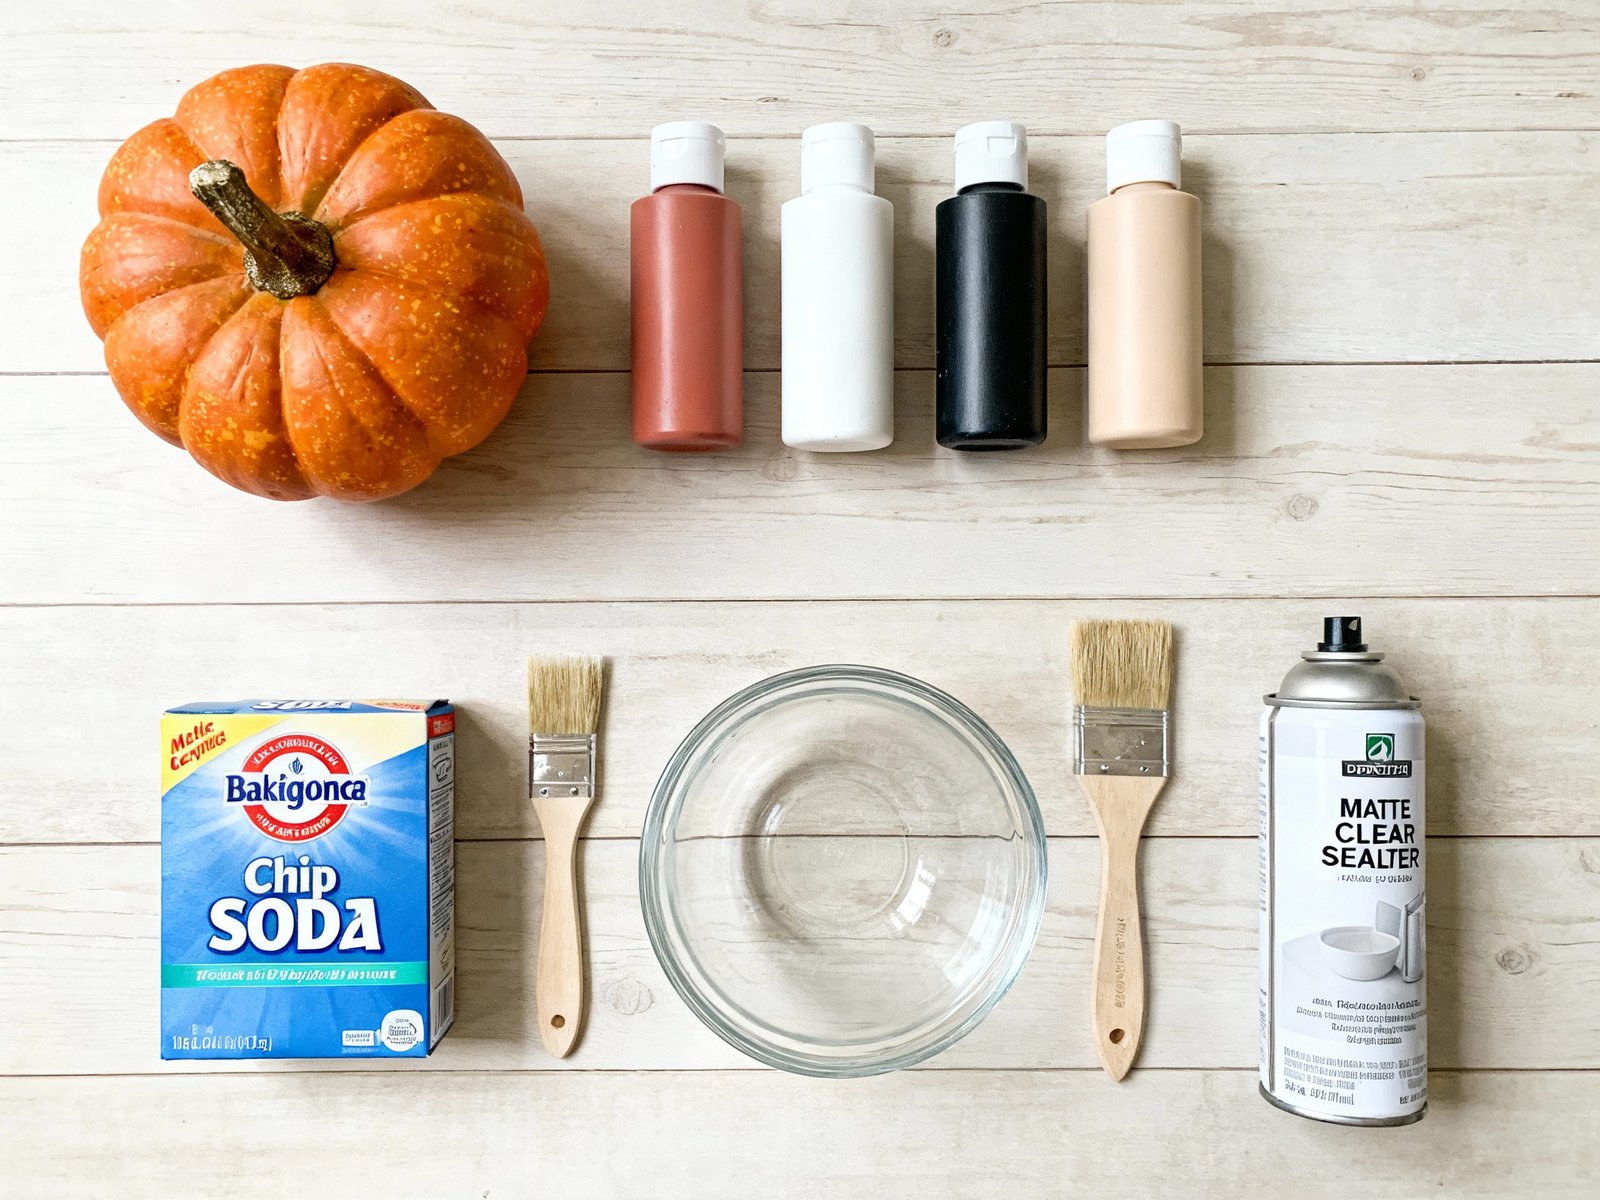
Materials You’ll Need
Gathering your supplies is simple. The magic is all in the mix!
-
Pumpkins: I prefer faux craft pumpkins (foam or plastic) so I can reuse these beauties every year. This technique works perfectly on real, clean pumpkins, too.
-
Matte Paint: Acrylic or chalk paint is perfect. Choose colors inspired by natural clay and glazes. I’m using:
-
Matte White
-
Terracotta / Burnt Sienna
-
Stone / Beige
-
Matte Black
-
-
THE SECRET INGREDIENT: Baking Soda!
-
Your Brushes:
-
A 1-2 inch cheap chip brush. The stiff, cheap bristles are actually better here, as they create the best texture.
-
A small artist brush for any details (optional).
-
-
Tools:
-
A mixing bowl or paper plate.
-
Something to stir with.
-
-
Matte Clear Sealer (Spray): This is essential! Do not skip this. It protects the finish and, most importantly, eliminates any leftover shine for that perfect, stony ceramic look.
Step-by-Step: The “Faux Pottery” Technique
Step 1: Prep Your Pumpkin
Wipe your pumpkin down to make sure it’s clean and dust-free. If you’re using a faux pumpkin, I like to gently twist and pull the plastic stem out. We can paint it separately or replace it later with a beautiful, rustic twig from the yard.
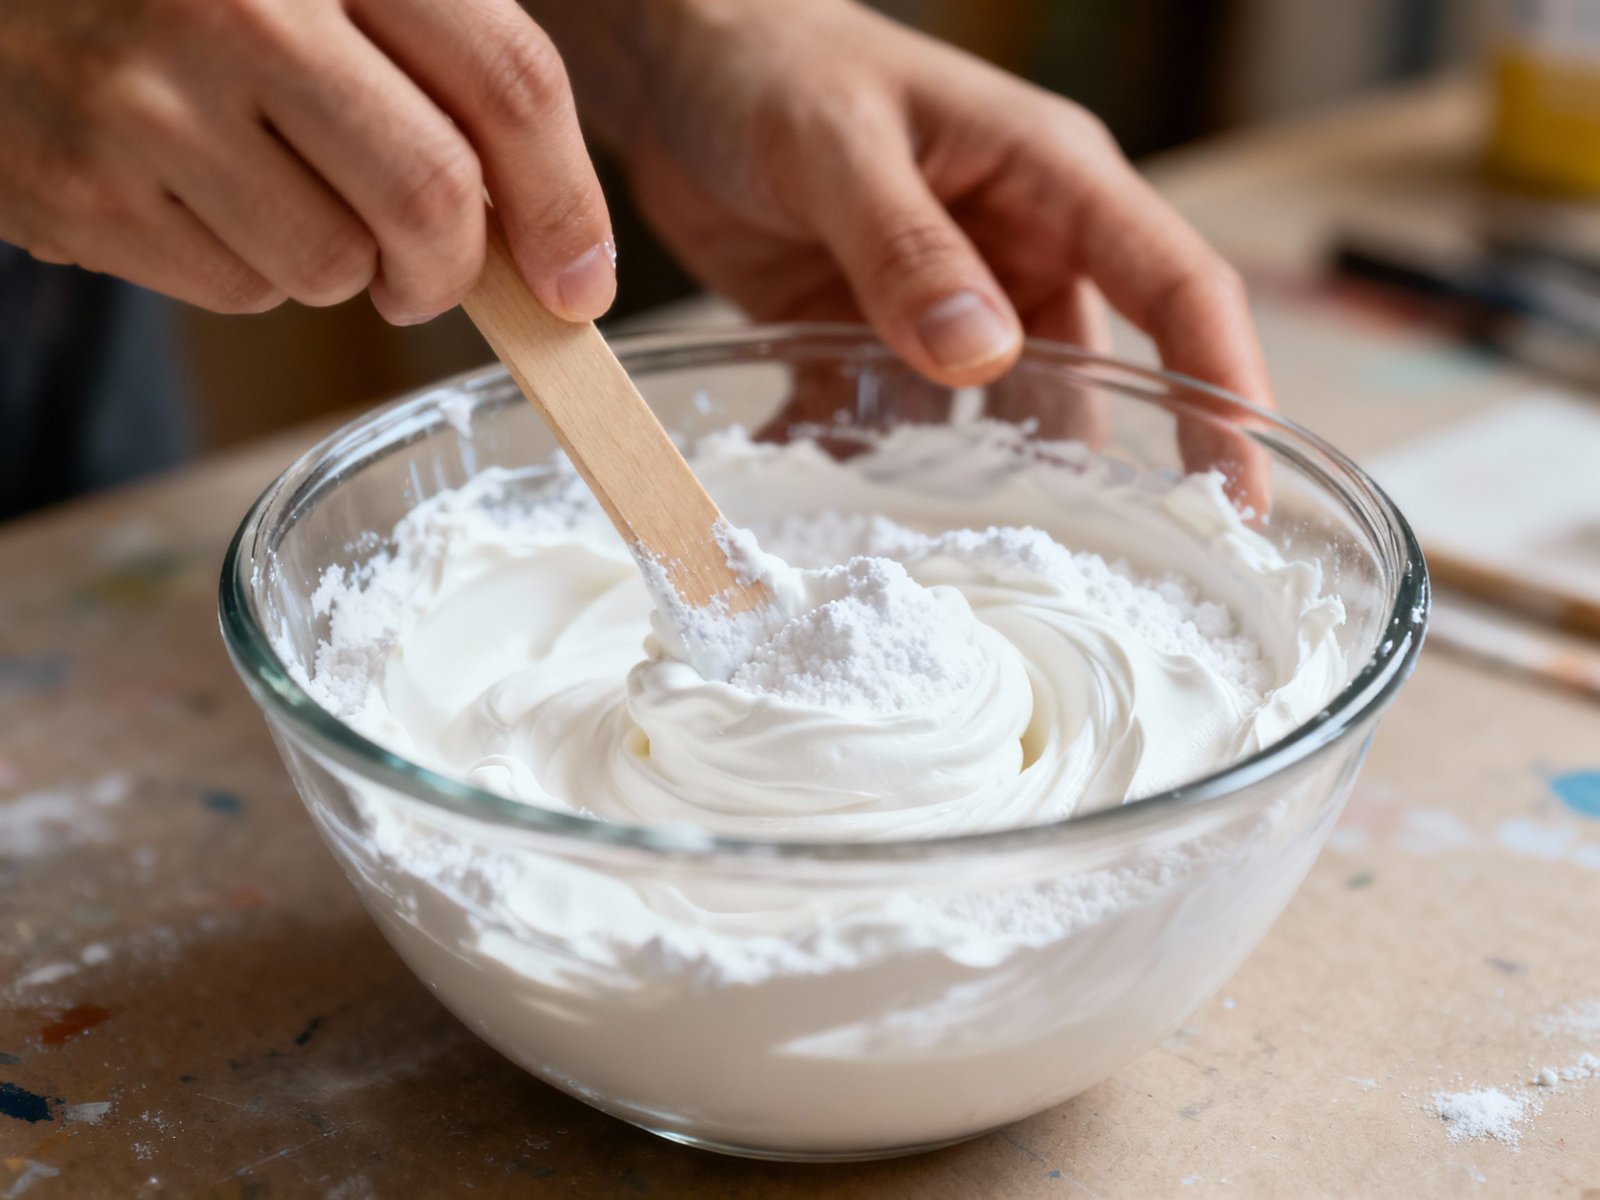
Step 2: Mix Your “Faux Ceramic Glaze”
This is where the magic happens. In your mixing bowl, pour a good amount of your base paint (let’s say, Terracotta).
Now, start adding your baking soda. I generally use a ratio of about 1 part baking soda to 3 parts paint, but you can’t really mess this up. Add more baking soda for a thicker, more textured “lava glaze” feel.
Mix it well until it has the consistency of a thick, fluffy mousse or spreadable frosting.
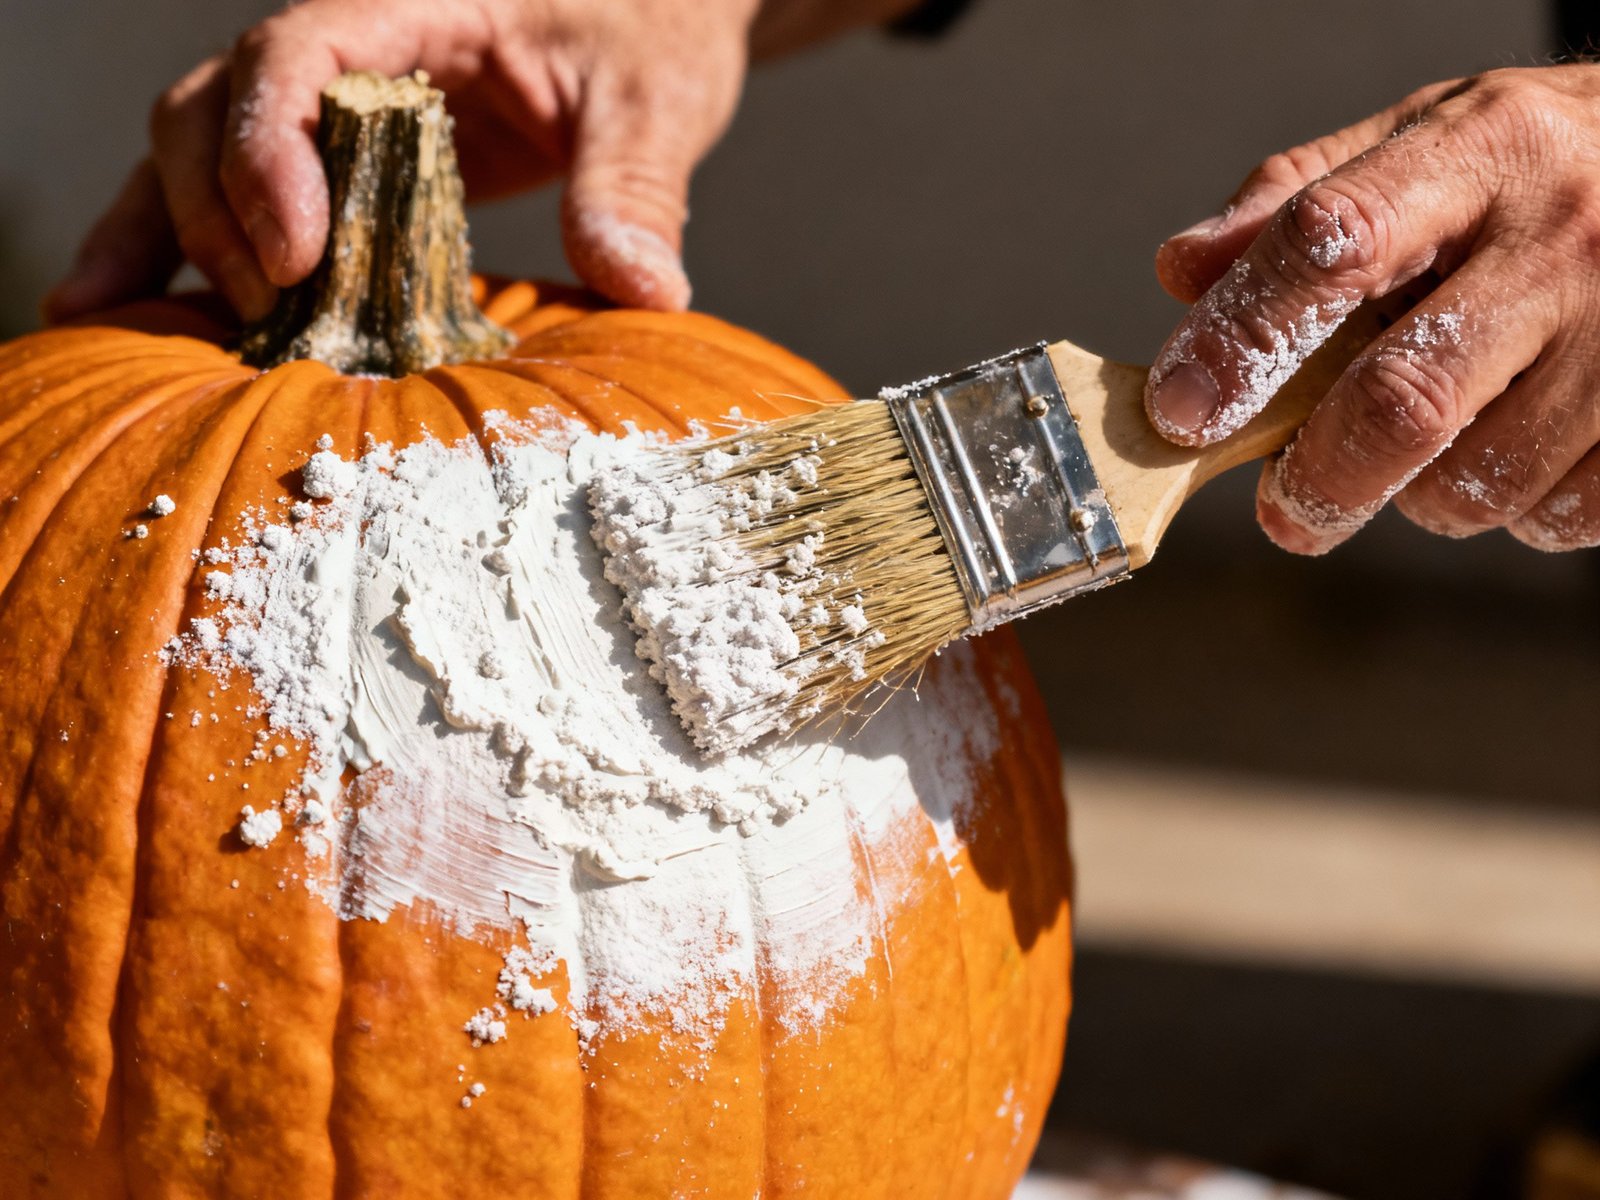
Step 3: Apply Your Textured Base Coat
Using your stiff chip brush, start applying the paint mixture all over the pumpkin.
My potter’s advice? Don’t be neat! The beauty of this look is in the imperfection. Use dabbing motions, pouncing, and visible, cross-hatched brush strokes. This is what makes it look like a hand-built piece of pottery, not something factory-made. Cover the whole pumpkin, including the bottom (you can do it in two sections if needed).
Step 4: Dry and Re-Coat (If Needed)
Let the first coat dry completely. Depending on how thick your mixture is, this can take 1-2 hours. It will dry into a gorgeous, chalky, matte finish.
Once dry, look it over. If you missed any spots or want to build up even more texture, apply a second coat.
Step 5: Seal Your Masterpiece
Take your pumpkin outside or to a well-ventilated area. Give it a full, even coat of Matte Clear Sealer. This is the final touch that protects the paint from chipping and, crucially, locks in that beautiful, non-reflective “ceramic” finish.
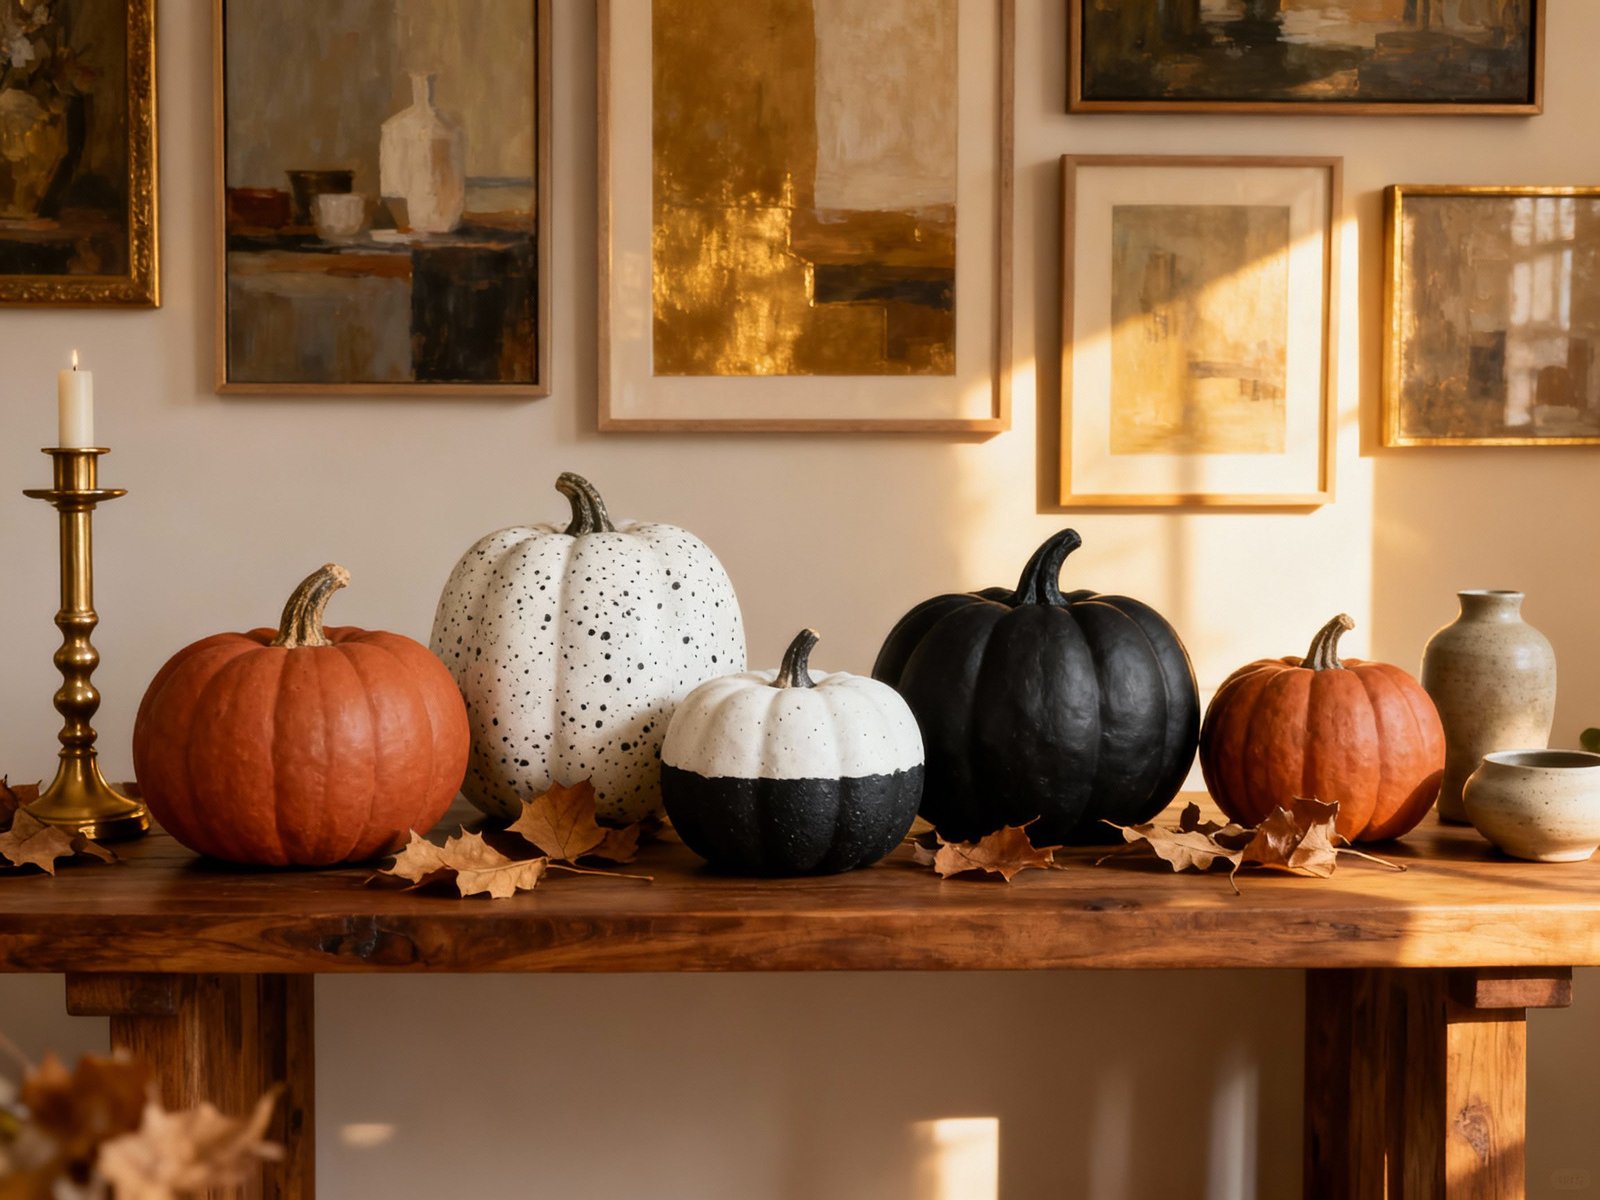
3 Easy Design Ideas (Inspired by the Studio)
You can stop at Step 5 for a beautiful, minimalist look, or you can add a final artistic layer. Here are a few of my favorite designs from the ceramic world.
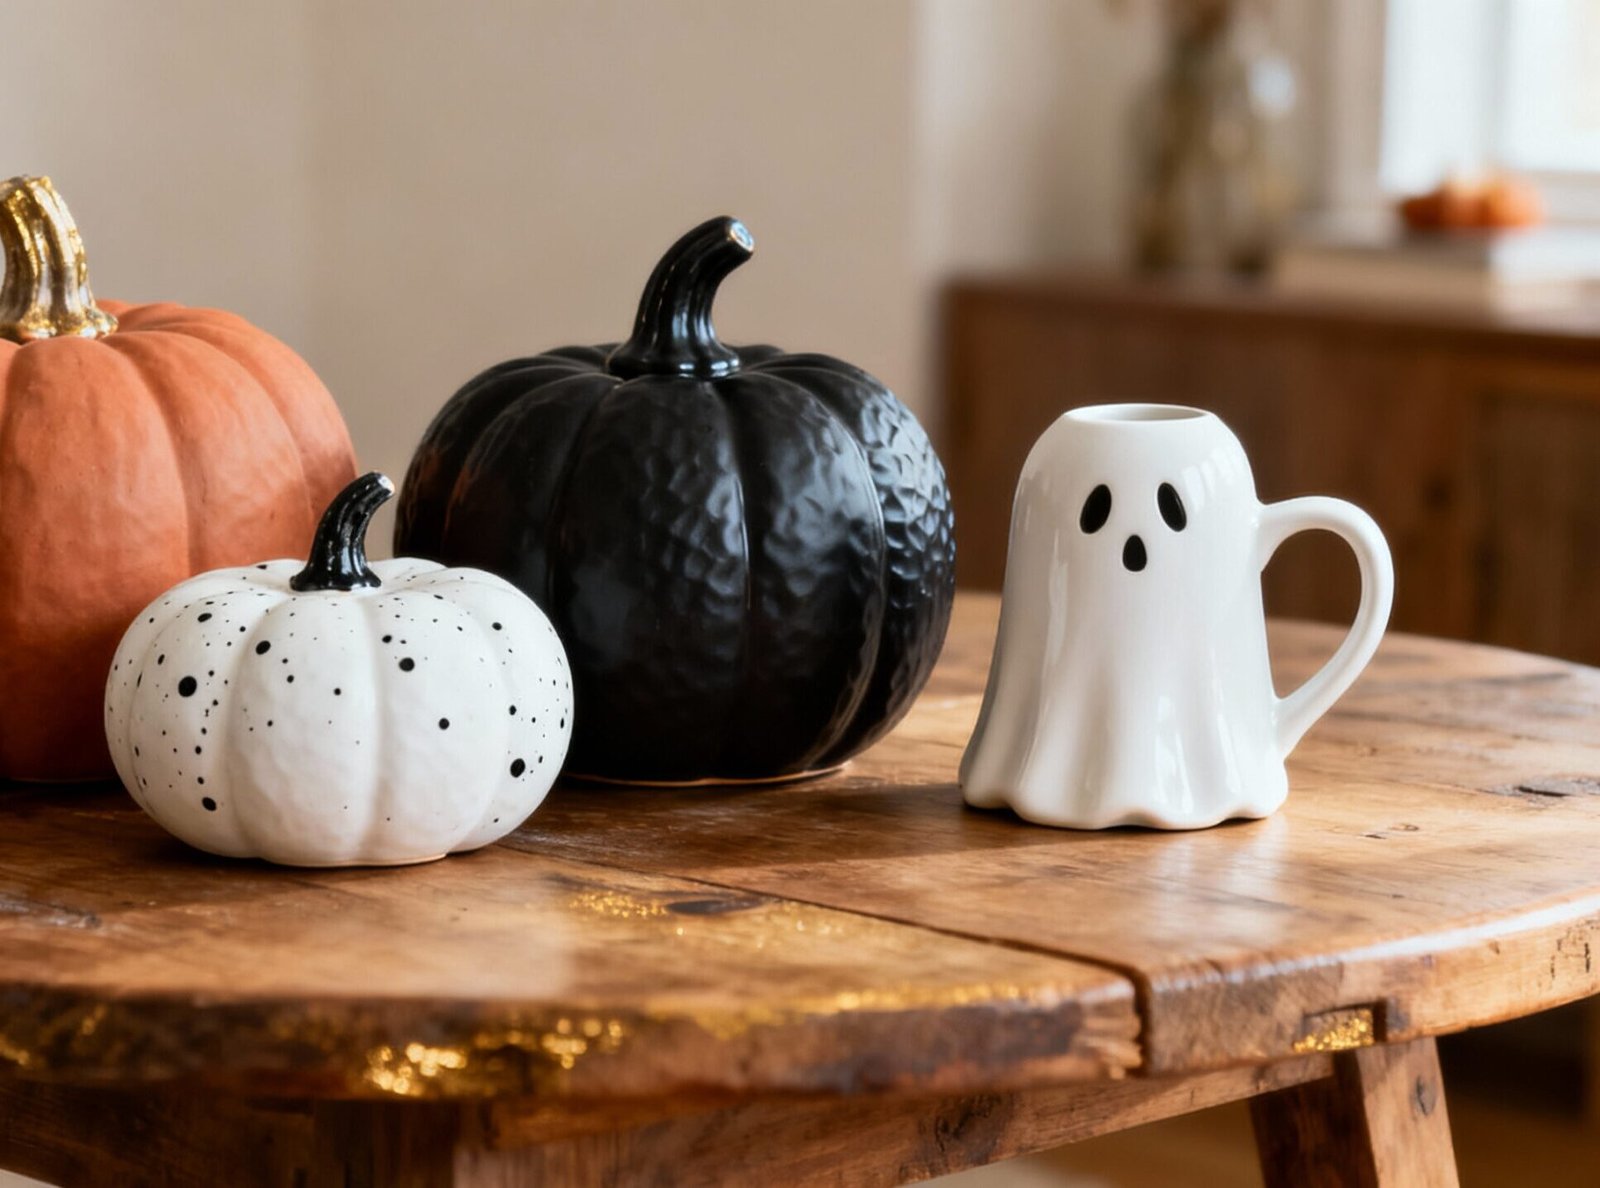
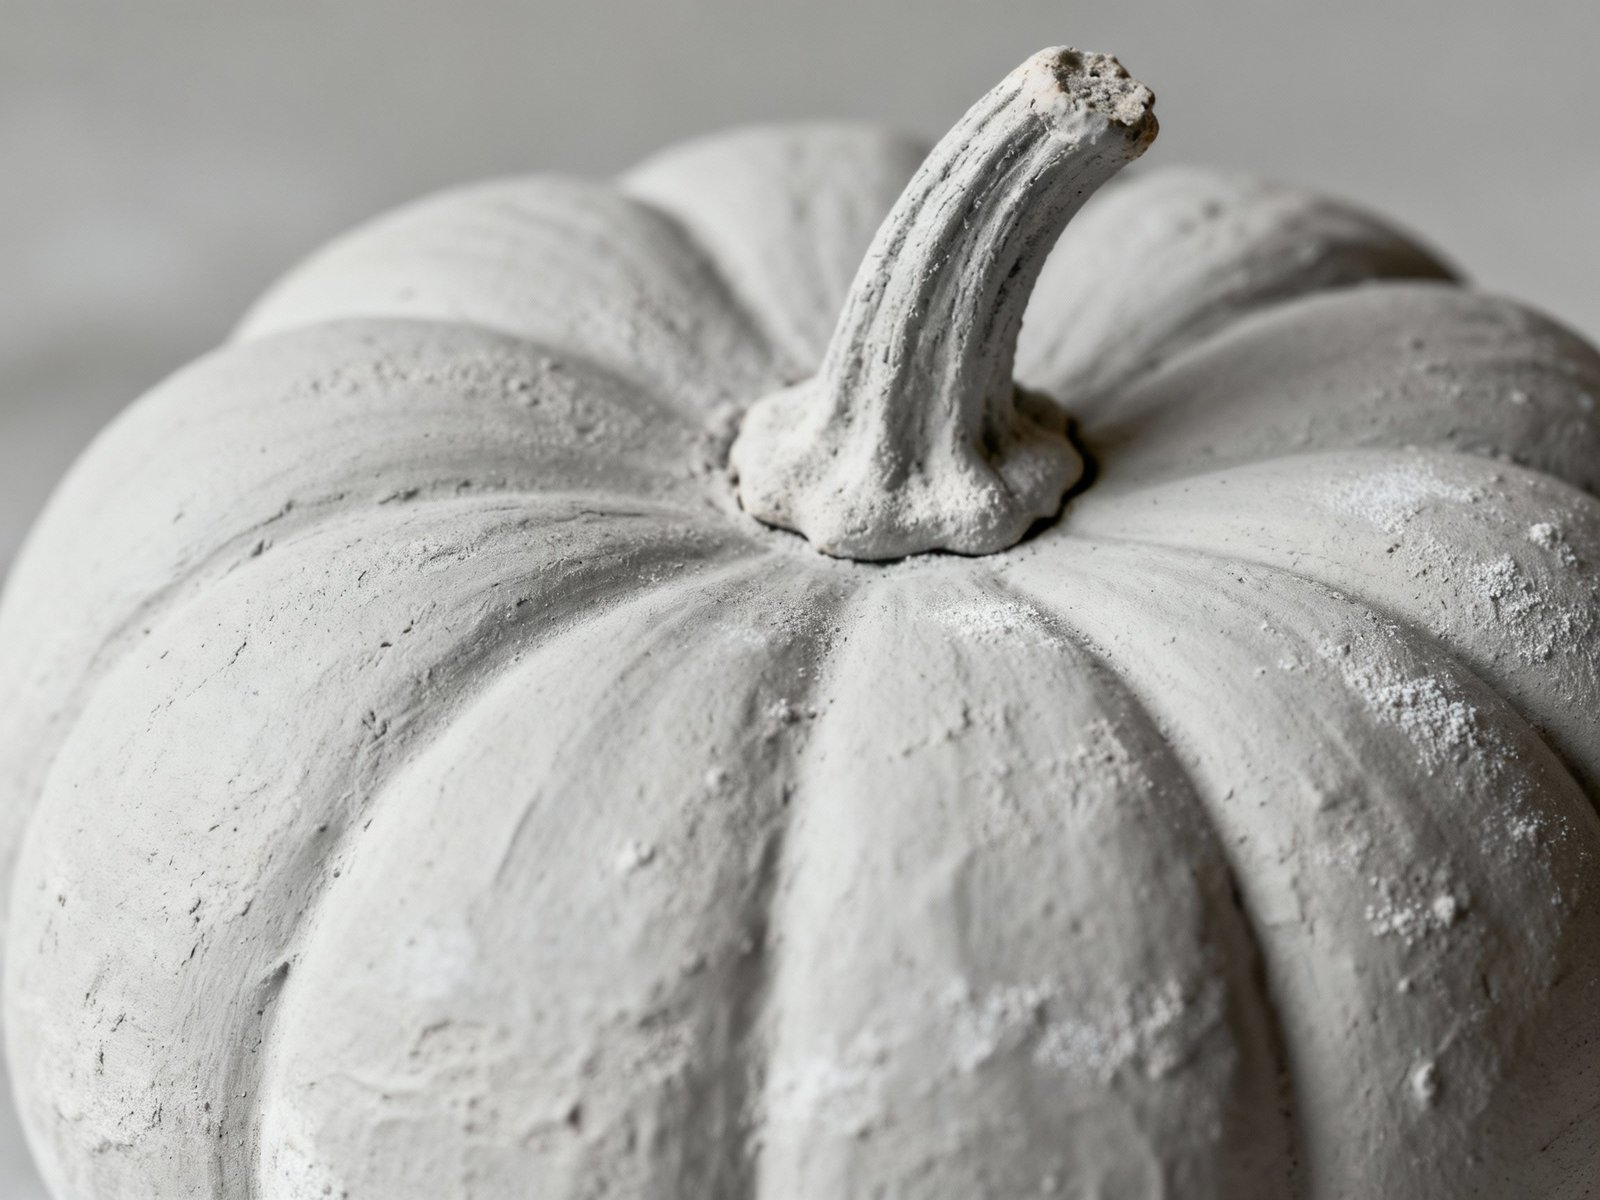
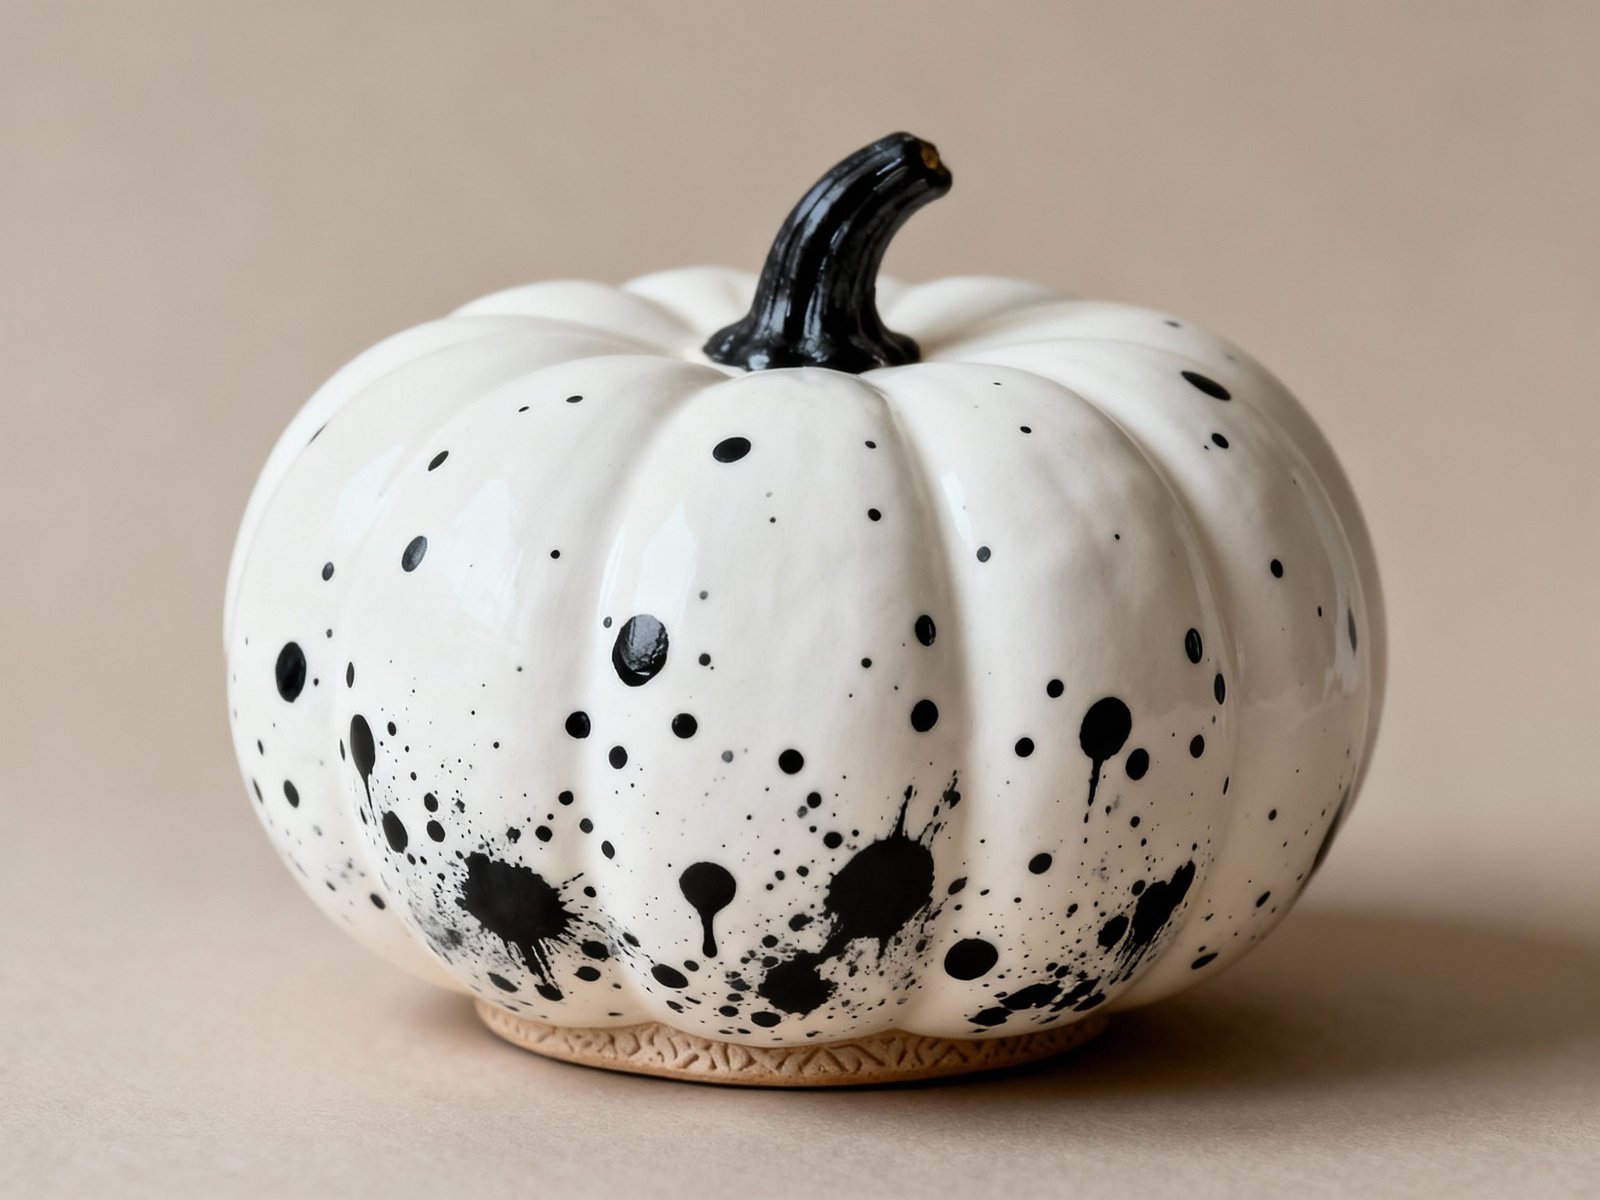
1. The “Wabi-Sabi Speckle”
This is my favorite! It looks just like the speckled clay body I use for my ‘Ghoul Ghost Mugs’.
-
How-To: On your dry, sealed base (a matte white or beige pumpkin works best), dip a small, stiff brush (an old toothbrush is perfect) into matte black paint. Point the brush towards your pumpkin and use your thumb to flick the bristles. This creates a fine, artistic splatter. Less is more!
-
Pairs With: Natural, rustic, and Wabi-Sabi decor.
2. The “Minimalist Two-Tone”
This design mimics the look of a pot being “dipped” in glaze. It’s clean, modern, and so sharp.
-
How-To: On your finished base pumpkin, use painter’s tape to tape off a clean line. You can tape off the bottom third, or just a simple band. Paint the section below the tape with a contrasting color (like matte white on a terracotta base). Let it dry, then carefully peel off the tape.
-
Pairs With: Modern, Scandinavian, or minimalist decor.
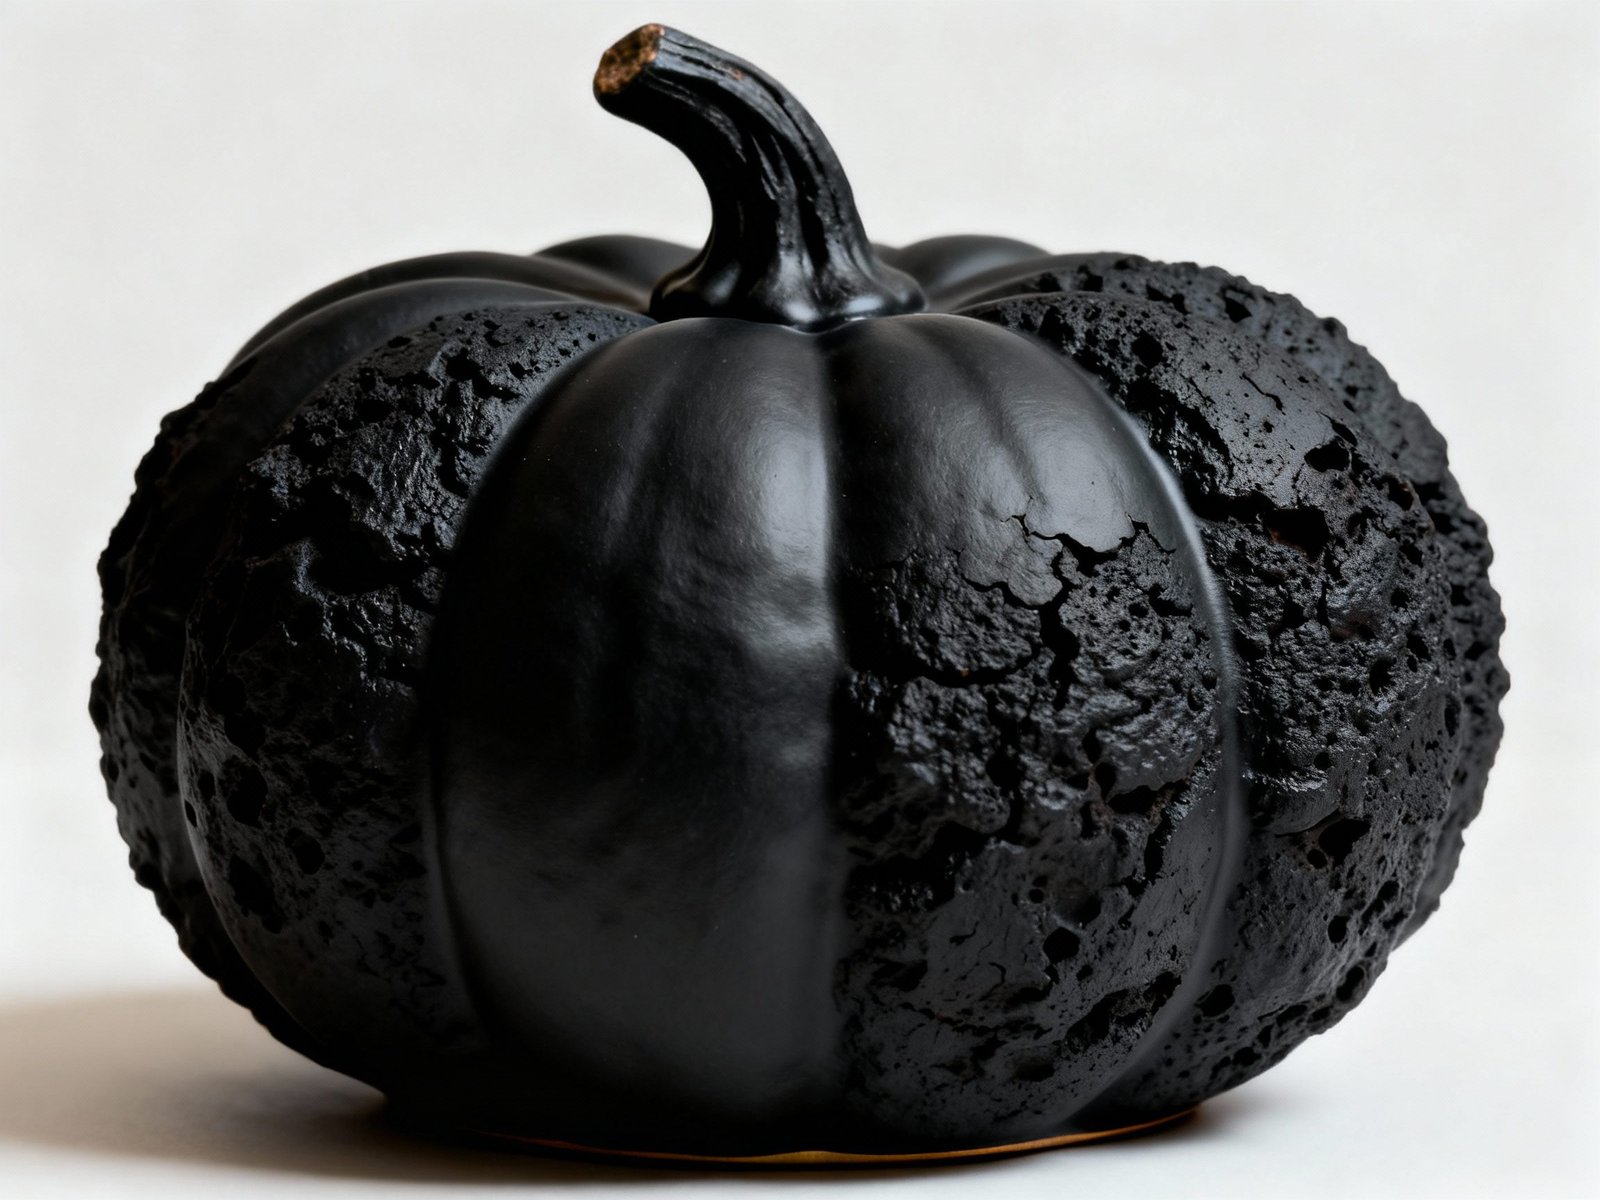
3. The “Matte Black Gourd”
This one is pure drama and so incredibly chic.
-
How-To: Just follow the main steps, but use matte black paint with a generous amount of baking soda. The rich texture on the black paint creates a “Brutalist” or “Lava Glaze” effect that looks like it was fired in a specialty kiln. It’s stunning on its own.
-
Pairs With: Dramatic, modern, or high-contrast interiors.
Your Studio-Worthy Fall Decor
And there you have it! A stunning, pottery-inspired pumpkin that costs almost nothing to make and adds a truly handmade, artistic touch to your home.
I truly believe your home should be a gallery of things you love, and this little project is the perfect way to make that happen this fall.
I would be thrilled to see your creations! If you try this DIY, please share a photo and tag me on Pinterest or Instagram @zeolar_ceramic and use the hashtag #zeolar_ceramic.
What other fall DIYs would you like to see me give a ceramic-inspired twist to? Let me know in the comments below!
Happy making!
—Leona